Miss Havisham practice hair and makeup
Due to lack of timing and being confident with my makeup design I decided to focus more on my Miss Havisham hair design. I created a sketch on my final design but was unsure how to recreate the design on longer hair. After speaking to Helen she gave me some advise and a short tutorial on how to create the Victorian style bun in my design.
Health and safety
when using the curlers I needed to make sure the i did not get the curlers too close to the scalp due to the curlers getting quite hot.
Miss Havisham hair
equipment:
hair pins
hair ties
hair brush
pin tail comb
curlers

Here is a photograph of my first attempt and my Miss Havisham practice look.
Firstly I created a centre parting.
Then I sectioned the hair into three two smaller sections either side of the hear and a larger section using my pin tail comb and sectioning clips.
Then I secured the larger section into a hair tie.
Next I took sections from the ponytail and roll the hair u towards the head and secured in place using hair pins .
Finally I created the ringlets by sectioning the hair and then working the curlers up the hair and applying hairspray to the ringlets to avoid them from dropping.
My first attempt at my Miss Havisham design i was slightly unhappy with, i wasn't too keen on the ringlets i felt they didn't work with my design and the Victorian style bun was situated too low therefore in order to become more confident with my design i practice it in my own time.
After speaking to Helen she suggested in order to make the Victorian style bun more secure when rolling the sections applying plenty of hairspray to each section.

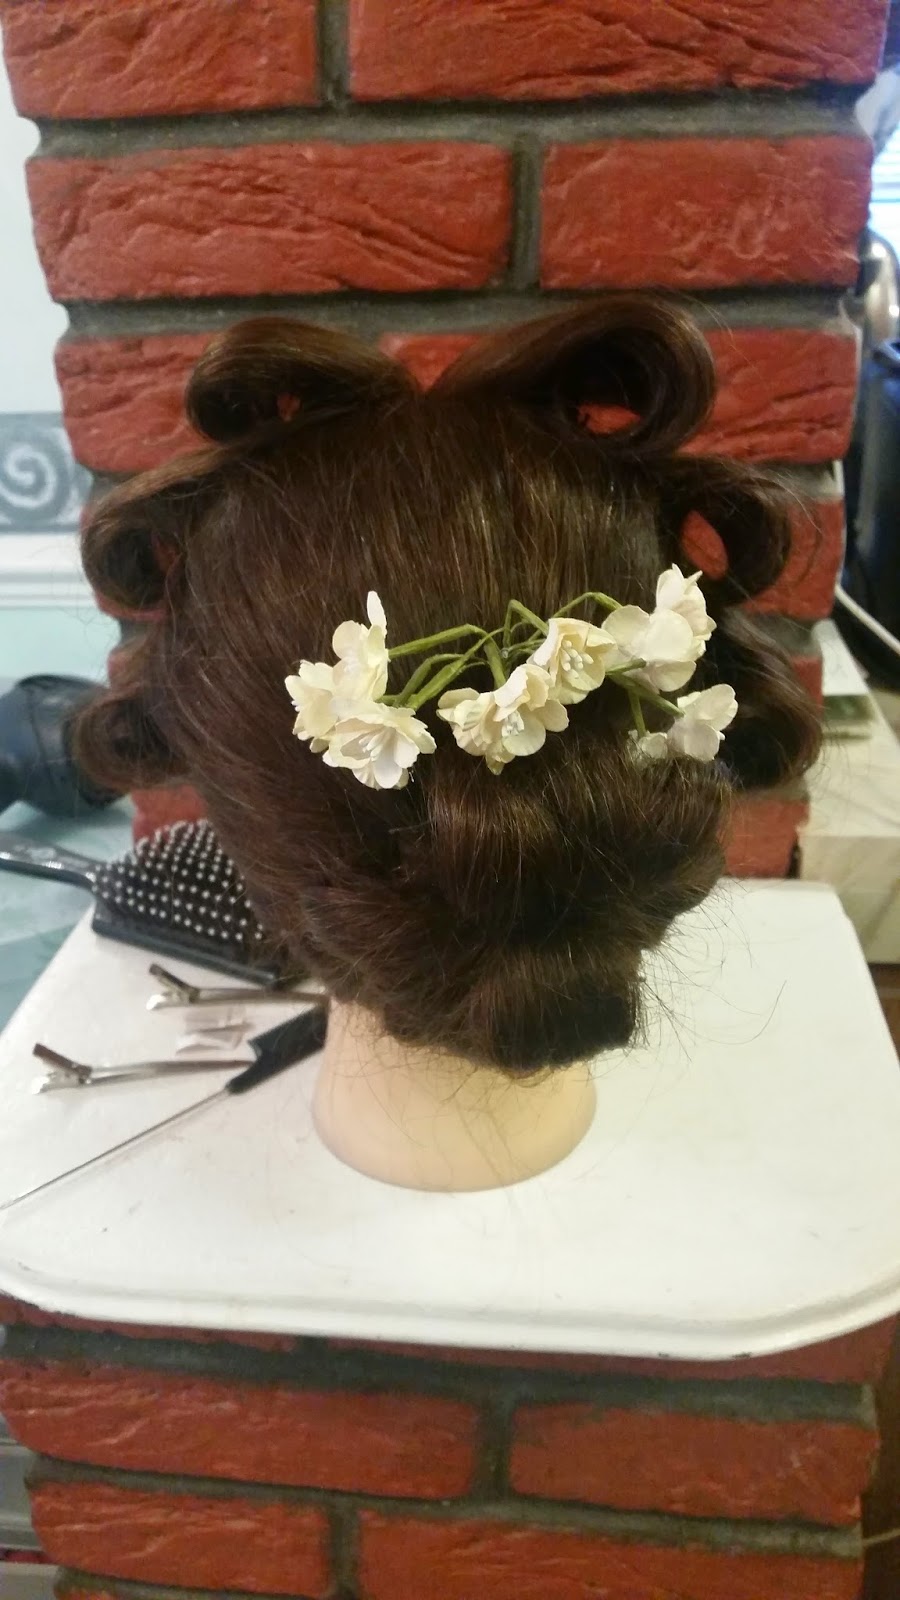
Here is a photograph of my Miss Havisham hairstyle which i practiced in my own time due to the dolls head having slightly shorter hair i found it easier. I also carried out the same method as i did in my technical lesson.
In the technical lesson due to being unhappy with the ringlets on my model in my own time i decided to experiment with rolling the sections using the same technique as the i did for the Victorian style bun, the top roll I decided to form a sculpted ringlet due to it being much shorter than the rest of the hair, I felt this design would work better due to my models hair being long,
here is another photograph of my previous design by with decoration added to the design, after practicing my Miss Havisham design in lesson at home i became more confident with recreating the deign for my continuity assessment.
Makeup
Due to having a short amount of time to practice my Miss Havisham designs i decided o practice the makeup at home in my own time. Due to being unsure of how to create my final makeup design for Miss Havisham which was a melted wax look i decided to speak to Sue who gave me advise on what product to use and where to purchase it, she also showed a tutorial in Thursdays technical lesson how to use gelatine to create special effects such as burns which was the product needed to create my final look, the technical lesson on creating burns also helped me to become more confident with using the gelatine.
equipment:
gelatine
camouflage pallet
kryolan foundation pallet
kryolan eyeshadow pallet
microwave
makeup brushes
paintbrushes
supracolour pallet
mascara wands
illamasqua loose powder
Health and safety
It is important to make sure the client is not allergic to any of the products used if the skin becomes red nd itchy the product must be removed immediately and rinsed under cold running water.
When removing the gelatine from the microwave it can be really hot so leave the gelatine to cool before applying to the clients skin also test the gelatine on the back of your hand to make sure its not too hot.
Next I applied a foundation from my Kryolan pallet which matched by skin colour I then applied the foundation to my face and blended out using the buffer brush next using the camouflage pallet and a fine ma brush I highlighted any visible lines in order to appear more aged using, using a white from my eye shadow pallet I used this to act as a highlighter and highlighted the wrinkles.
I applied a light pink blusher to the cheeks to also highlight than makeup element and kept the eye makeup natural .
 On the side of the face which didn't have the gelatine I created stipple skin and malnourished lips using a glue which I left to tacky and peel which I then covered over with a foundation.
Finally in order to portray the idea of Miss Havisham being burnt by the fire I used gelatine which I applied to the top left hand side of my face, which I then left to go tacky, then using my red from my surpacolour pallet I applied colour to area using a paintbrush in order to get a burned effect, I then applied another layer of gelatine to the area in order to give it a shine and make the burn look dramatic.
Overall I was really happy with outcome of the makeup and am considering using the idea for my final design. however I am going to practice the makeup design in order to become more confident with the design particularly with the aged makeup.
For my second attempt at my final design, I used a different form of gelatine which was a slab of gelatine from screen face which I melted down in the microwave. I found this form of gelatine was thicker and worked much better than the gelatine granules especially for my melted face look.

In order to create my look I firstly applied a kryolan foundation to my face which I blended in using my buffer brush. One the side of the face which didn't not have the gelatine applied to the face using my camouflage pallet I started to add colour to any visible lines. I then highlighted over the visible lines using a white colour from my camouflage pallet.
next I melted the gelatine in the microwave and waited for the substance to slightly cool, in order to make the gelatine dry I used a hairdryer on a cool temperature.
I layered up the gelatine several times on the left side o my face in order to make the gelatine thicker and the drips more dramatic to look like melted wax.
 I then applied a loose illamasqua powder over top of the gelatine to set the mixture and then used my kryolan foundation to bend into make the gelatine blend into the rest of my face . I then began highlighting the visible lines on the left ide of my face using a fine line brush, this was the make both sides of my face look aged and slightly even .In order to make the makeup seem a little Victorian I applied a light pink blush to the cheeks and a light grey colour to the eyes. Using a red lip liner pencil I went round my eyes to make my Miss Havisham character appear tired. I also applied a light colour to the lips
 Finally to complete my Miss Havisham makeup I created a burn, by applying a layer of gelatine which I left to go tacky and then applied reds and a black from my supracolour and aquacolour pallet to make the burn seem more life like, once I had applied the colour to the burn I applied another layer of gelatine to make the bur seem sore and more dramatic.
Overall I was really happy with my design however in order to complete the burn I feel I needed to apply some blood and maybe Vaseline.
Finally to complete my Miss Havisham makeup I created a burn, by applying a layer of gelatine which I left to go tacky and then applied reds and a black from my supracolour and aquacolour pallet to make the burn seem more life like, once I had applied the colour to the burn I applied another layer of gelatine to make the bur seem sore and more dramatic.
Overall I was really happy with my design however in order to complete the burn I feel I needed to apply some blood and maybe Vaseline.
Name :Kerry
Age : 22
Skin type: dry
Skin tone: fair (alabaster foundation kryolan)
Eye colour: greyish blue
Notes: fair skin tone and freckles
Client 3
Name: Heidi (myself)
Age: 20
Skin type: dry
Skin tone: olive
Eye Colour : Brown
Notes: Olive skin tone / olive kryolan foundation base
Overall I was really happy with my design however in order to complete the burn I feel I needed to apply some blood and maybe Vaseline.
Consultation notes
client 1:Name :Kerry
Age : 22
Skin type: dry
Skin tone: fair (alabaster foundation kryolan)
Eye colour: greyish blue
Notes: fair skin tone and freckles
Client 3
Name: Heidi (myself)
Age: 20
Skin type: dry
Skin tone: olive
Eye Colour : Brown
Notes: Olive skin tone / olive kryolan foundation base
No comments:
Post a Comment